Introduction to No-Bake Pumpkin Pie Balls
If you’re a busy young professional (like most of us!), juggling work deadlines, social commitments, and maybe even personal projects, you know how challenging it can be to carve out time to prepare treats that both satisfy your sweet tooth and impress your friends. Enter the no-bake pumpkin pie balls—the perfect solution for those who crave something delicious without the hassle of traditional baking.
Why No-Bake Desserts are Perfect for Busy Young Professionals
Imagine coming home after a long day, craving something comforting and seasonal yet realizing you have no time or energy to whip up an extravagant dessert. This is where no-bake recipes shine! They require minimal effort, no oven, and are often quicker to prepare than you might think. Plus, they’re usually composed of wholesome ingredients that can fit into a balanced diet — perfect for those keeping an eye on nutrition.
No-bake pumpkin pie balls are not only simple to make, they also bring a warm, autumn-inspired flavor to your life, offering a delightful way to enjoy the season’s best produce. With rich pumpkin, aromatic spices, and a sweet touch of maple syrup, they are bound to brighten up your day.
In fact, according to a survey by the American Baker’s Association, about 75% of people would choose a no-bake dessert for its convenience, leaving more time for everything else that life throws your way. You can enjoy them as an afternoon snack, share them at your next gather with friends, or simply make a batch to savor after dinner.
Here’s the best part: they are highly customizable! Want to swap in nut butter for extra protein? Go for it! You can even roll them in crushed nuts or coconut flakes for a fun twist. The flexibility of this recipe means that you can experiment while keeping it stress-free.
So grab your favorite mixing bowl and let’s dive into the world of no-bake pumpkin pie balls. Your taste buds will thank you, and your busy schedule will breathe a sigh of relief. For more ideas on quick and healthy snacking, check out resources like Healthline for more tips and tricks.
Stay tuned for the full recipe—your new favorite treat is just around the corner!
Ingredients for No-Bake Pumpkin Pie Balls
Essential Ingredients
Creating delicious no-bake pumpkin pie balls requires just a handful of pantry staples. Here’s what you’ll need:
- Pumpkin Puree: The star of the show! Use canned pumpkin for convenience, or roast your own for a fresher flavor.
- Cream Cheese: Adds a rich, creamy texture.
- Graham Cracker Crumbs: For that classic pie crust taste.
- Sugar: Granulated or brown sugar works wonders for sweetness.
- Pumpkin Pie Spice: A blend of cinnamon, nutmeg, and ginger elevates your dessert.
- Vanilla Extract: A splash enhances all the flavors beautifully.
- Salt: Just a pinch to balance the sweetness.
Optional Add-ins and Substitutes
Don’t hesitate to get creative! Try these optional add-ins for an extra flavor boost:
- Chopped Nuts: Pecans or walnuts add crunch.
- Coconut Flakes: Unsweetened for a tropical twist.
- Chocolate Chips: Who can resist a bit of chocolate?
If you’re out of any essential ingredient, consider these substitutes:
- Use Greek yogurt instead of cream cheese for a lighter option.
- Swap honey or maple syrup for sugar to make it healthier.
These versatile ingredients not only make for a delicious treat but can also be found readily at most grocery stores. Need more ideas? Check out AllRecipes for inspiration!
Step-by-Step Preparation of No-Bake Pumpkin Pie Balls
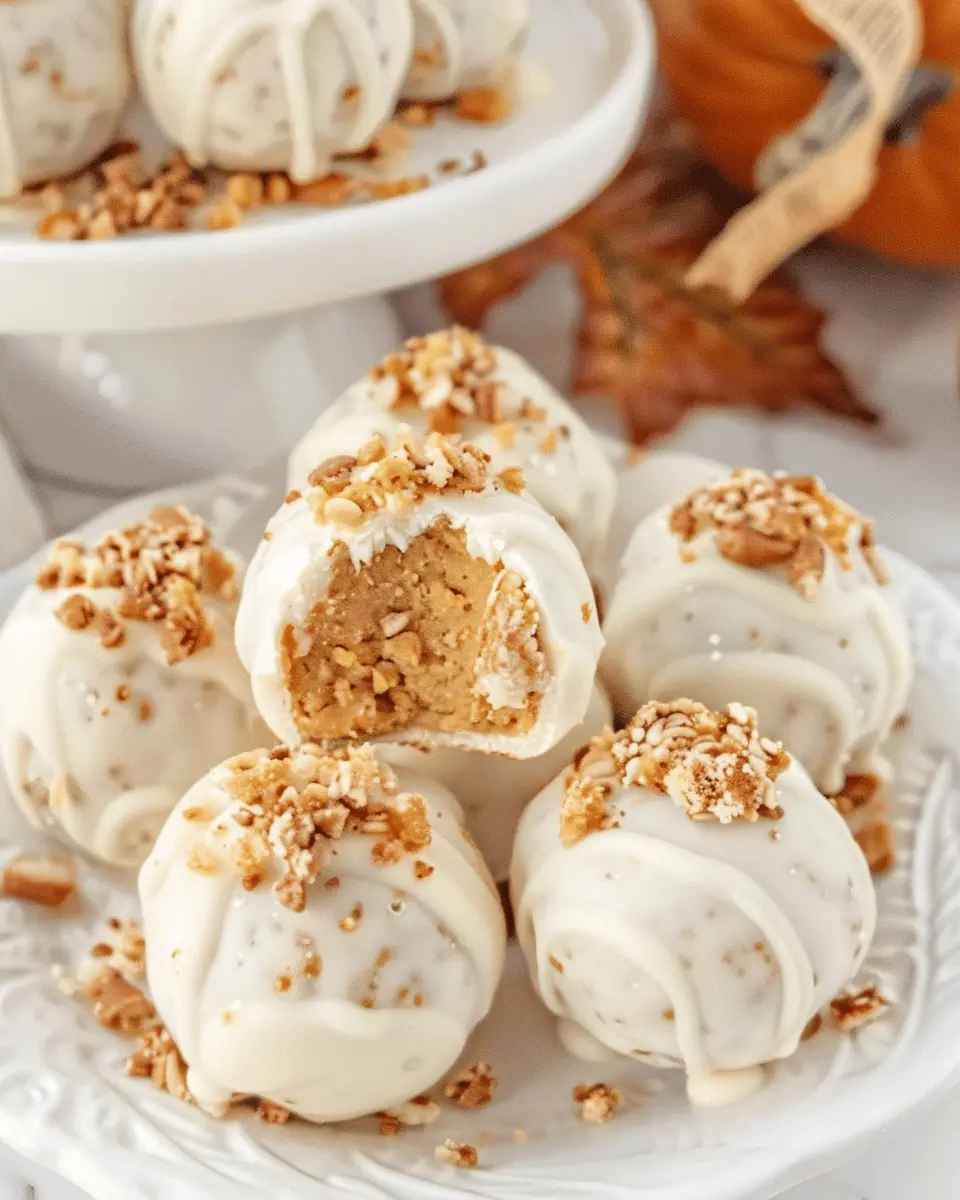
Creating no-bake pumpkin pie balls at home is not just a delightful treat but also a fun way to indulge in your favorite seasonal flavors without firing up the oven. These little bites pack all the classic pumpkin pie tastes into a tempting, bite-sized morsel that’s perfect for snacking anytime. Let’s dive into the steps to make these scrumptious treats!
Gather Your Ingredients
Before you start whipping up these pumpkin pie balls, it’s essential to gather all your ingredients. Here’s what you’ll need:
- 1 cup pumpkin puree (canned or homemade)
- 1 cup graham cracker crumbs
- 1/2 cup powdered sugar
- 1/2 teaspoon pumpkin pie spice (or a mix of cinnamon, nutmeg, and ginger)
- 1/4 cup cream cheese, softened (this ties the flavors together beautifully)
- 1/2 cup white chocolate or dark chocolate chips for coating
- Optional toppings: chopped nuts, coconut flakes, or even a sprinkle of extra pumpkin pie spice
Once you have your ingredients ready, you’ll be amazed at how quickly these delicious no-bake pumpkin pie balls come together!
Prepare the Pumpkin Pie Filling
Next, let’s create the rich filling that will form the base of our pumpkin pie balls. In a mixing bowl, combine the pumpkin puree, graham cracker crumbs, powdered sugar, cream cheese, and pumpkin pie spice.
Using an electric mixer or a sturdy spatula, blend the ingredients until they reach a smooth, cohesive mixture. This step allows the flavors to meld beautifully. You might want to try a little taste test—just to ensure you have the right balance of sweetness and spiciness! If you love a good pumpkin pie, you’ll be pleasantly surprised at how much this mixture resembles that classic flavor.
Shape the Pumpkin Pie Balls
With your filling prepared, it’s time for one of the most exciting parts—shaping the balls! Take small amounts of the mixture and roll them between your palms to create uniform balls, about one inch in diameter.
For best results, line a baking sheet with parchment paper. This not only prevents sticking but also makes cleanup a breeze. Aim for roughly 12-15 balls, depending on how large you’d like them. Feel free to involve friends or family in this part; it’s a great activity for bonding and can lead to some fun, spontaneous moments!
Chill and Set
After you’ve shaped all your pumpkin pie balls, pop them in the refrigerator for about 30 minutes. Chilling helps them firm up, making it easier to coat them in chocolate later. While they’re cooling, why not take a moment to relax with a cup of your favorite beverage? An herbal tea or a warm apple cider pairs beautifully with the pumpkin flavor!
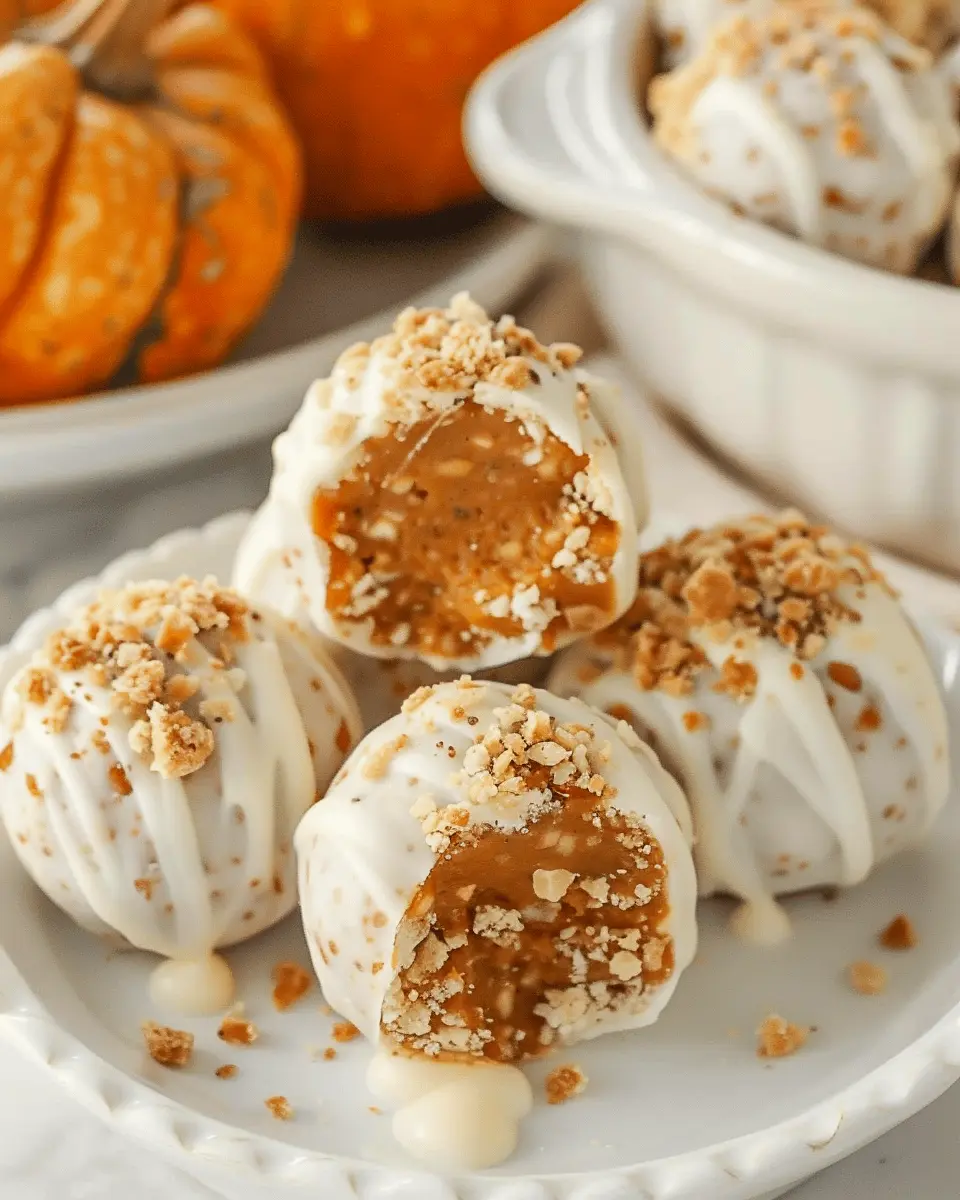
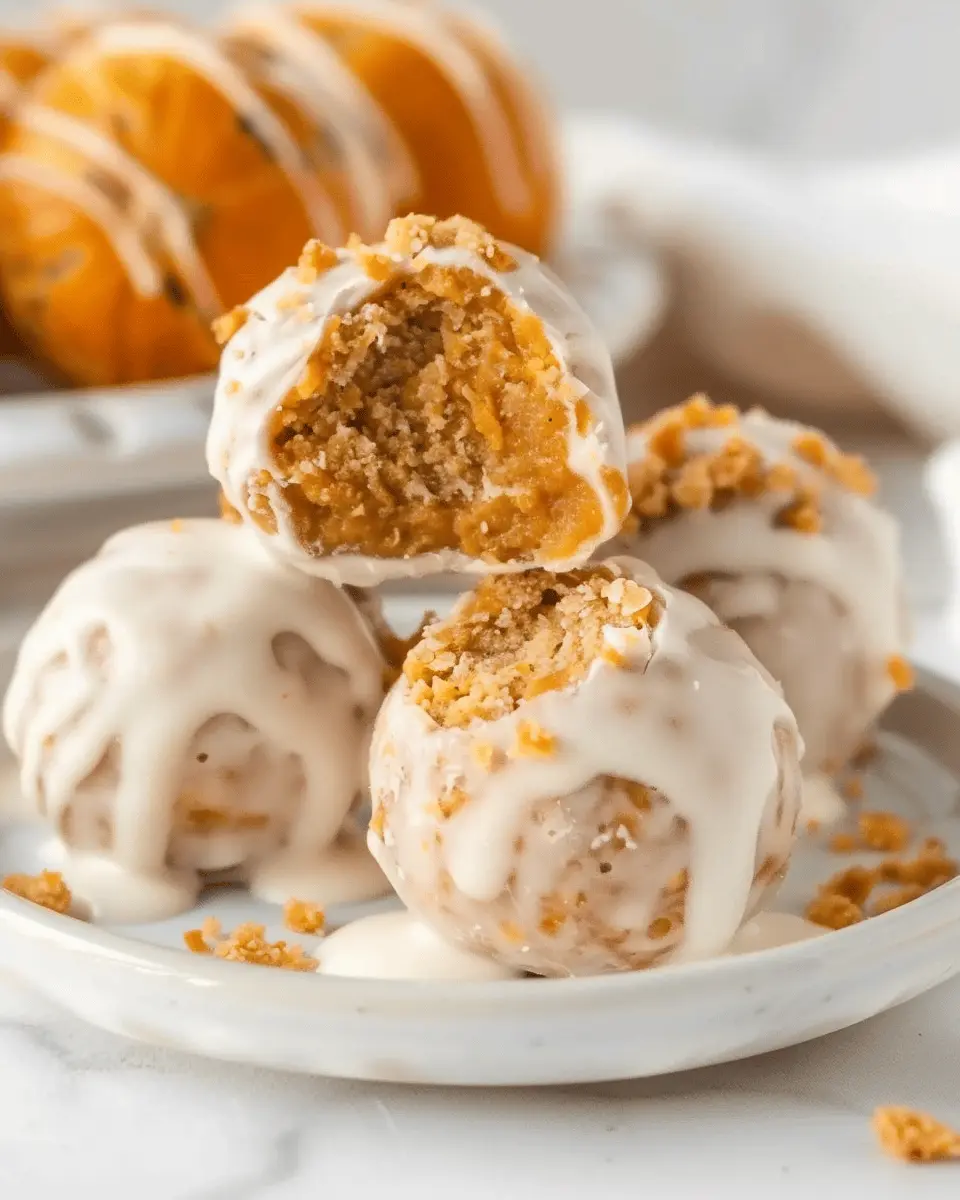
Coat and Decorate
Now comes the fun part—coating and decorating your no-bake pumpkin pie balls! In a microwave-safe bowl, gently melt the white chocolate or dark chocolate chips in short bursts of 30 seconds, stirring in between until it’s silky smooth.
Using a fork, dip each chilled pumpkin ball into the melted chocolate, ensuring they’re fully coated. Place them back on the parchment-lined sheet. If you’re feeling adventurous, sprinkle your toppings of choice on top of the still-warm chocolate. Chopped nuts offer a delightful crunch, while coconut adds a sweet touch.
Once you’ve coated and decorated all your pumpkin pie balls, return them to the fridge to allow the chocolate to set, which should take about 15-20 minutes.
And there you have it! After all the steps, you’ll have a batch of irresistible no-bake pumpkin pie balls ready to enjoy. Whether for a holiday gathering or a cozy night in, these treats can be a hit! Consider sharing your creations on social media and inspire others to whip up their own batches. Happy snacking!
For more delicious pumpkin recipes, check out Food Network’s pumpkin collection.

Creative Variations on No-Bake Pumpkin Pie Balls
Nut-Free Pumpkin Pie Balls
If you want to enjoy no-bake pumpkin pie balls without nuts, you’re in luck! Opt for sunbutter or pumpkin seed butter as a creamy base to achieve that delightful texture. Not only do these alternatives taste fantastic, but they also provide a nut-free option that’s perfect for gatherings. Just combine your choice of seed butter with the pumpkin puree, graham cracker crumbs, and spices, and roll them into bite-sized treats.
For an added twist, you might consider coating them in crushed pumpkin spice cereal instead of traditional crumbs. It gives that classic crunch with a seasonal flair!
Gluten-Free Adaptations
Want to keep it gluten-free? Simply swap out traditional graham cracker crumbs for gluten-free alternatives. Store-bought options are widely available, or you can make your own by grinding gluten-free oats or rice crackers. This small change allows everyone at your table to indulge in these no-bake pumpkin pie balls without worry.
Another fun take is to add a sprinkle of spices like cinnamon and nutmeg directly into the mixture. This enhances the flavors and complements that lovely pumpkin taste.
And if you’re looking to get a little adventurous, try adding in some dark chocolate chips or mini marshmallows for an extra layer of flavor. These small tweaks can elevate your dessert into a gourmet experience while still keeping it simple and accessible.
By embracing these variations, your no-bake pumpkin pie balls can cater to various dietary preferences while remaining delicious and easy to prepare. For more ideas, check out these easy no-bake recipes that can inspire you to create even more treats!
Important Notes for Making No-Bake Pumpkin Pie Balls
Tips for Handling the Candy Coating
When making no-bake pumpkin pie balls, the candy coating can be a bit tricky. Here’s a friendly tip: let your chocolate sit at room temperature after melting to ensure it’s not too hot when you dip your pumpkin balls. A cooler temperature can create a smoother coating. If you’re using sprinkles or crushed nuts, have them ready before you start dipping, so the candy coating doesn’t harden before you can add the finishing touch!
Storage Tips for Leftovers
If you find yourself with leftover no-bake pumpkin pie balls (which is sometimes hard to believe, but hey, it happens!), simply store them in an airtight container in the fridge. They’ll stay fresh for about a week. For longer-term storage, you can freeze them—just make sure to separate them with parchment paper to prevent sticking. When you’re ready to indulge, simply let them thaw in the fridge for a few hours. Trust me, they taste just as delightful!
If you’re looking for more tips on storage and leftovers, check out this great guide!
Serving Suggestions for No-Bake Pumpkin Pie Balls
Perfect Pairings for the Holidays
When it comes to enjoying no-bake pumpkin pie balls, think beyond the traditional dessert table. These delightful treats pair wonderfully with a variety of flavors! Consider serving them alongside:
- Creamy whipped cream: A dollop on top adds an elegant touch.
- Fall fruits: Slices of crisp apples or juicy pears provide a fresh contrast.
- Nutty flavors: Lightly salted walnuts or pecans enhance the earthy pumpkin taste.
For beverages, consider a warm chai latte or a spiced apple cider to keep the cozy vibes rolling. This article offers a delicious chai recipe to try.
Presentation Ideas for Parties
Setting the scene can elevate your no-bake pumpkin pie balls into a showstopper. Here are some creative ideas:
- Mini treat cups: Serve each pumpkin ball in a small cup with a toothpick for easy grabbing.
- Garnish with cinnamon: A sprinkle of cinnamon or nutmeg on top adds a festive look.
- Decorative platters: Arrange the balls on a colorful platter, interspersed with seasonal decor like mini pumpkins or leaves.
These small touches will create an inviting atmosphere that your guests will remember!
Time Breakdown for Making No-Bake Pumpkin Pie Balls
Preparation Time
Getting started on these delicious no-bake pumpkin pie balls is a breeze! You’ll need about 15 minutes to gather your ingredients and mix everything together. This quick prep time makes it easy to whip them up even on a busy day.
Chilling Time
Once you’ve shaped the balls, it’s time for them to chill out in the refrigerator. Allow them to sit for about 30 minutes. This ensures they set properly and develop that delightful texture we all love.
Total Time
From start to finish, plan for roughly 45 minutes to indulge in your homemade no-bake pumpkin pie balls. This makes them an ideal treat for gatherings or a sweet snack throughout the week!
For more tips on creating delicious desserts, check out Food Network or Bon Appétit.
Nutritional Facts for No-Bake Pumpkin Pie Balls
Approximate Calories per Ball
If you’re wondering about the calorie count, each no-bake pumpkin pie ball contains roughly 80-100 calories. This makes them a delightful treat that won’t completely derail your diet during the holiday season or weekend snacking. Plus, since they are made with wholesome ingredients, you can feel good about indulging!
Key Nutritional Benefits
The beauty of these no-bake pumpkin pie balls lies in their nutritious ingredients. Pumpkin, for instance, is low in calories and high in vitamins A and C, which are essential for good vision and immune support. The nuts provide healthy fats and protein, helping to keep you full longer. And don’t forget the fiber—perfect for digestive health! For a deep dive into the perks of pumpkin, check out Healthline’s article on pumpkin nutrition.
Adding these delightful balls to your snack rotation not only satisfies your sweet tooth but also packs a nutritional punch. So go ahead, enjoy these guilt-free bites!
FAQs About No-Bake Pumpkin Pie Balls
How long do they last in the fridge?
One of the great things about no-bake pumpkin pie balls is their convenience! When stored properly in an airtight container, these delightful treats can last up to a week in the fridge. Just be sure to keep them sealed to maintain their flavor and texture. If you notice any signs of spoilage, such as changes in smell or texture, it’s best to play it safe and discard them. For more tips on food storage, check out FoodSafety.gov.
Can I use homemade pumpkin pie instead?
Absolutely! Using homemade pumpkin pie is a fantastic way to elevate your no-bake pumpkin pie balls. Just crumble the pie and mix it with your other ingredients. Keep in mind that the moisture content may differ slightly from canned pumpkin or pumpkin puree, so you might need to adjust the other ingredients accordingly. If you love making your own pie, this could be a fun twist that uses up leftovers!
What’s the best way to store them?
For best results, store your no-bake pumpkin pie balls in the refrigerator. If you want to keep them for longer, consider freezing them. Just lay them out on a baking sheet in a single layer for about an hour, then transfer them to a freezer-safe container or bag. This prevents them from sticking together. When you’re ready to enjoy, let them thaw in the fridge or at room temperature. Enjoy the convenience of having a delicious, healthy snack ready anytime!
Conclusion on No-Bake Pumpkin Pie Balls
Final Thoughts on Enjoying These Delicious Treats
As we wrap up our journey into the world of no-bake pumpkin pie balls, remember that these delightful treats are as easy to make as they are to enjoy. Perfect for gatherings or a personal indulgence, they’re sure to be a hit!
Imagine biting into a soft, spiced ball that captures the essence of fall—it’s bliss! You can easily customize the flavors or toppings to suit your taste preferences. Plus, they’re a fantastic option for those busy weeks when you need a quick dessert fix.
For more creative dessert ideas, check out sites like Food Network or Epicurious for inspiration. Enjoy those no-bake pumpkin pie balls and let the season of flavors begin!
PrintNo-Bake Pumpkin Pie Balls: Easy, Indulgent Fall Treats
These No-Bake Pumpkin Pie Balls are the perfect fall treat that combine the flavors of pumpkin pie in a fun, bite-sized form.
- Prep Time: 20 minutes
- Cook Time: 0 minutes
- Total Time: 20 minutes
- Yield: 24 balls
- Category: Dessert
- Method: No-Bake
- Cuisine: American
- Diet: Vegetarian
Ingredients
- 1 cup pumpkin puree
- 1 cup graham cracker crumbs
- ½ cup powdered sugar
- 1 teaspoon pumpkin pie spice
- ¼ cup cream cheese, softened
- ½ cup white chocolate chips
- 2 tablespoons coconut oil
Instructions
- In a bowl, combine pumpkin puree, graham cracker crumbs, powdered sugar, pumpkin pie spice, and softened cream cheese.
- Mix until all ingredients are well combined.
- Shape the mixture into small balls and place them on a baking sheet lined with parchment paper.
- In a microwave-safe bowl, melt white chocolate chips and coconut oil together.
- Dip each pumpkin ball in the melted chocolate, then return them to the baking sheet.
- Refrigerate until the chocolate is set.
Notes
- Add chopped nuts or sprinkles as toppings for extra texture.
- These can be made ahead of time and stored in the fridge for a week.
Nutrition
- Serving Size: 1 ball
- Calories: 90
- Sugar: 8g
- Sodium: 30mg
- Fat: 5g
- Saturated Fat: 3g
- Unsaturated Fat: 1g
- Trans Fat: 0g
- Carbohydrates: 9g
- Fiber: 1g
- Protein: 1g
- Cholesterol: 10mg