
Introduction to Witch Hat Halloween Cookies
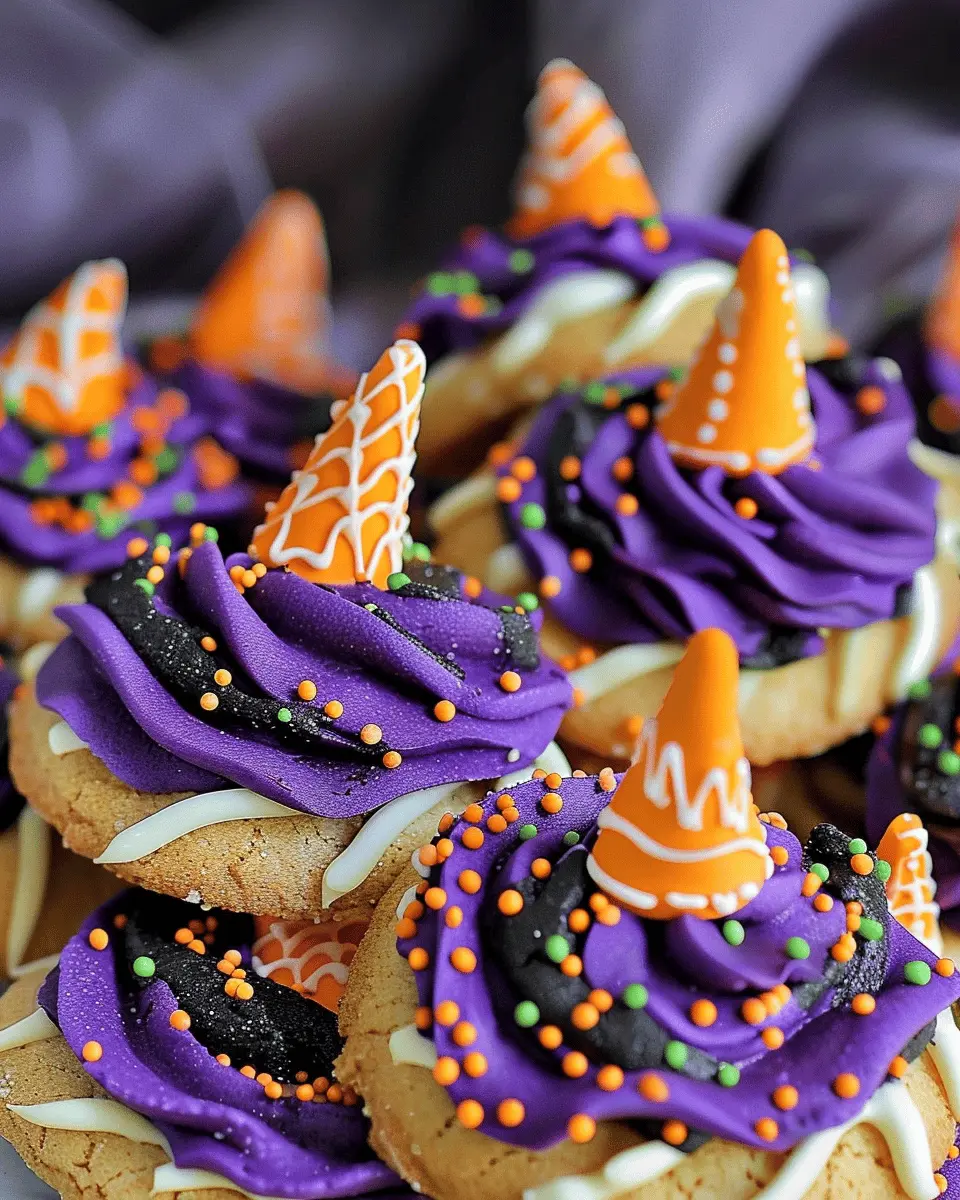
When the leaves begin to change and the air gets a little crisper, spirits rise and excitement builds in preparation for Halloween. One delightful tradition that has emerged over the years is the joy of baking and decorating festive cookies. These edible creations not only taste great but also serve as a creative outlet for both kids and adults. So, why are Halloween cookies, especially witch hat Halloween cookies, such a fun tradition?
Creating Memories Together
Everyone has their unique memories associated with Halloween—trick-or-treating, costume parties, or haunted house visits. But let’s not forget the thrill of baking! The kitchen becomes a hub of joy as you gather your friends or family to whip up spooky treats. It’s a time for laughter, imagination, and maybe a few missed flour tosses along the way! Activities like these are perfect for strengthening those bonds, as people share stories and create lasting memories together.
Getting Creative with Decor
What’s cool about holiday-themed cookies is the endless creativity they unleash. From using vibrant colors to shaping dough into fun forms, your witch hat Halloween cookies can reflect your personal style or even spooky themes. With a simple recipe and a few decorating supplies, you can transform plain cookies into extraordinary treats. If you’re looking for inspiration, sites like Taste of Home offer loads of inventive ideas, perfect for unleashing your inner baker.
A Sweet Addition to Celebrations
Halloween cookies also serve as an excellent conversation starter and make fantastic treats for gatherings. Whether you’re hosting a costume party or just having friends over for a movie marathon, having vibrant, theme-aligned cookies adds that special touch to the festivities. These sweet snacks not only delight the taste buds but can also double as spooky decor.
So, roll up your sleeves, preheat that oven, and get ready to make magic happen in the kitchen! Our witch hat Halloween cookies recipe is a great way to embrace the spirit of Halloween while having a blast decorating and sharing your delicious creations. Ready to get started? Let’s dive into the details of how to make these bewitching treats.
Ingredients for Witch Hat Halloween Cookies
Essential ingredients for the cookies
To make these delightful witch hat Halloween cookies, you’ll need a few key ingredients that come together for a deliciously spooky treat:
- Sugar Cookies: The perfect base for your witch hats, soft and sweet. You can make them from scratch or use store-bought dough if you’re short on time.
- Chocolate Kisses: These tasty chocolates form the peak of the witch hat, adding a rich, melty flavor.
- Black or Dark Chocolate Frosting: Use this to stick the chocolate kisses to the cookies and create a visually striking design.
- Orange Sprinkles: These festive sprinkles add a pop of color and playfulness to your cookies.
- Cornstarch: This helps with the dough’s texture, making your cookies extra soft and chewy.
For a detailed sugar cookie recipe, consider checking out resources like King Arthur Baking.
Optional toppings and decorations
Unleash your creativity with some optional toppings and decorations to make your witch hat Halloween cookies truly unique:
- Candy Corn: Perfect for adding a fun, colorful touch.
- Edible Glitter: Make your cookies sparkle like a spooky night sky.
- Miniature Bats or Ghosts: Add these as fun edible decorations to bring your cookie scene to life.
- Colored Icing: Use this for extra designs, like cobwebs or stars, to enhance the Halloween theme.
Feel free to mix and match to find your perfect combo! The only limit is your imagination. Who knows? You might end up with your favorite Halloween treat ever.
Preparing Witch Hat Halloween Cookies
Halloween is just around the corner, and if you’re looking to impress your friends or add a festive touch to your gathering, then witch hat Halloween cookies are the perfect treat! They’re easy to make, fun to decorate, and will surely impress everyone with their charm. Let’s dive into the step-by-step process of preparing these delightful cookies!
Gather all your materials
To start, you’ll want to have all your ingredients and tools ready. Here’s what you’ll need:
-
For the cookie dough:
-
2 ¾ cups all-purpose flour
-
1 tsp baking soda
-
½ tsp baking powder
-
1 cup unsalted butter, softened
-
1 cup granulated sugar
-
1 cup brown sugar
-
2 large eggs
-
1 tsp vanilla extract
-
½ tsp salt
-
For decoration:
-
Chocolate candy kisses or hugs
-
Colored icing (black, green, or purple) for embellishment
-
Optional: sprinkles or edible glitter for a magical touch
-
Tools:
-
Mixing bowls
-
Cookie sheets
-
Parchment paper
-
Rolling pin
-
Cookie cutters (optional)
Having everything at your fingertips will make your baking process seamless and enjoyable.
Mix the dry ingredients
Now, let’s get started by mixing the dry ingredients. In a large bowl, whisk together the flour, baking soda, baking powder, and salt. This is a crucial step, as it ensures that your witch hat Halloween cookies will rise nicely and have a delightful texture. Make it a fun activity by enlisting the help of a friend or family member—after all, baking is best when shared!
For more tips on measuring flour correctly, check out this guide, which can help you get accurate amounts and achieve the perfect consistency.
Create the cookie dough
In another bowl, cream together the softened butter, granulated sugar, and brown sugar. Once fluffy, add the eggs and vanilla extract, mixing thoroughly. Gradually incorporate the dry mixture until just combined. Don’t overmix; a few flour streaks are okay—this keeps your cookies tender!
Chill the dough
After the dough is mixed, it’s essential to chill it for about 30 minutes. You can wrap it in plastic wrap and pop it in the fridge. Chilling helps the flavors to meld and ensures that your cookies maintain their shape when baking. Trust me, this simple step is a game-changer!
Shape and bake the cookies
Preheat your oven to 350°F (175°C). When the dough is ready, take it out and roll it onto a floured surface to about ¼ inch thickness. Use cookie cutters or a knife to create triangular shapes, which will resemble little witch hats. Place them on a baking sheet lined with parchment paper.
Bake for about 10-12 minutes until the edges turn a light golden brown. Remember, every oven is different, so keep an eye on them!
Add the chocolate hug or kiss
Once your cookies have cooled, it’s time for the fun part—decorating! Press a chocolate kiss or hug into the center of each cookie. This acts as the “point” of your witch hat. Now comes the icing part! Use colored icing to create decorative touches on the cookies, perhaps some little eyes, cobwebs, or even sparkles. The possibilities are endless, and it’s a fantastic way to express your creativity.
When you’re done, put your witch hat Halloween cookies on display for everyone to admire—don’t be surprised if they disappear quickly!
These cookies are not only a delectable treat but also a great way to connect with friends and family during the spooky season. Enjoy baking, and happy Halloween!
Variations on Witch Hat Halloween Cookies
Creative flavor alternatives
While traditional witch hat Halloween cookies use classic chocolate and vanilla flavors, don’t hesitate to get adventurous with your taste palette! Here are a few suggestions to spice things up:
- Peanut Butter Delight: Swap in peanut butter cookies as your base for that nostalgic flavor combo. The rich taste pairs beautifully with chocolate and adds a nutty crunch.
- Pumpkin Spice Twist: Incorporate pumpkin puree and seasonal spices like cinnamon and nutmeg. These flavors are sure to evoke the essence of fall while perfectly complementing the spooky theme.
- Mint Chocolate: If you’re a mint lover, why not try chocolate mint cookies? A hint of peppermint oil brings a festive touch that will dance on your taste buds.
For more delightful ideas, check out Bakerella’s recommendations on flavor infusions.
Different decorations for Halloween cheer
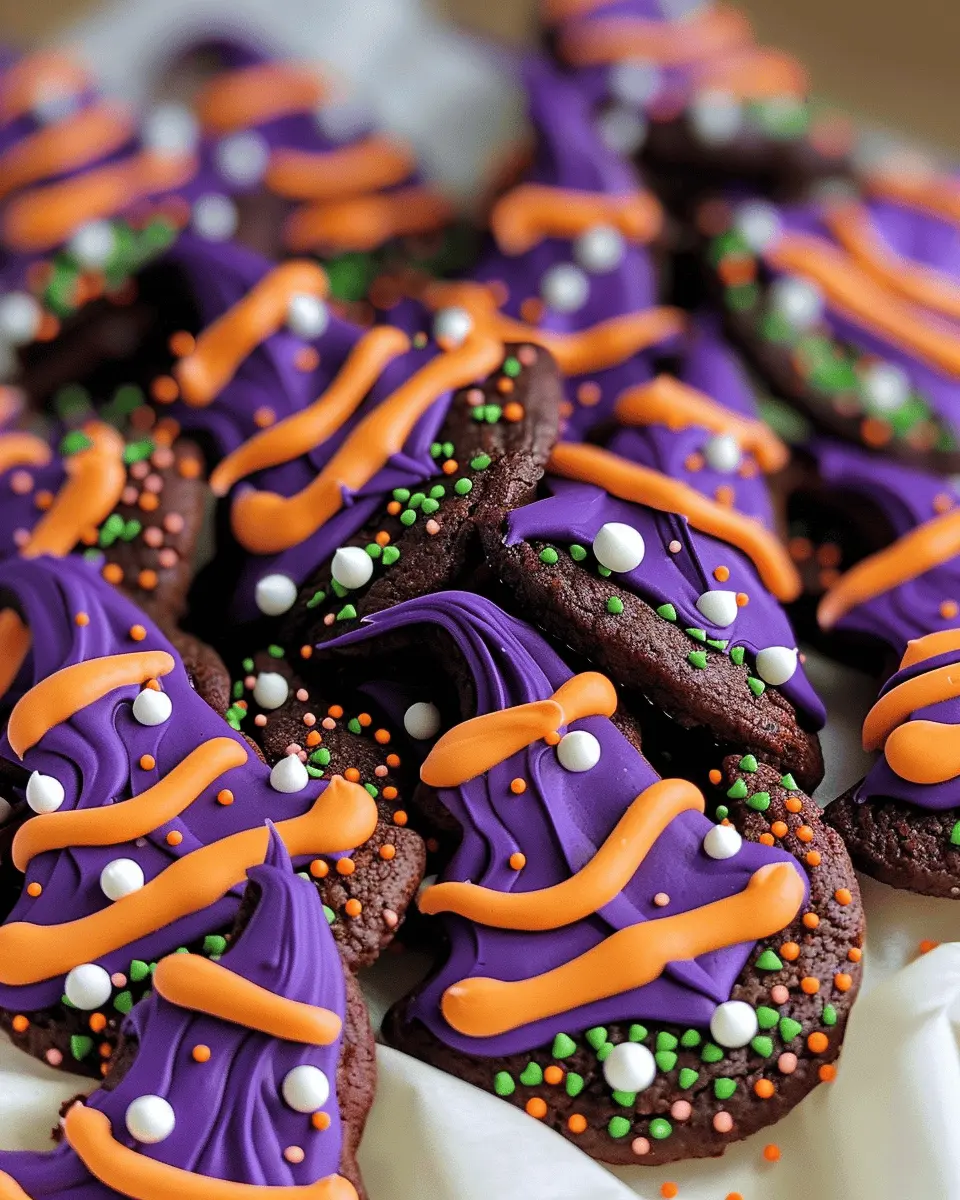
Bring your witch hat Halloween cookies to life with fun decorations that scream Halloween! Here are a few tips:
- Colorful Icing: Use vibrant colored icing to create your own unique designs. Think green for witch’s skin or purple for magical spells. You can also add edible glitter for that extra sparkle!
- Creative Toppers: Instead of the typical chocolate kiss, go for gummy worms, candy eyes, or even miniature candy bats. They’re both fun and festive.
- Sprinkles Galore: Top your cookies with themed sprinkles—ghosts, bats, and pumpkins are widely available and can transform an ordinary cookie into a Halloween masterpiece.
By exploring these creative variations and decorations, your witch hat Halloween cookies will not only taste fantastic but also become a hit at any Halloween gathering. Whether hosting a party or sharing treats with friends, these cookies are bound to enchant everyone!
Baking Notes for Witch Hat Halloween Cookies
When it comes to baking witch hat Halloween cookies, achieving the perfect cookie texture is key. Here are some helpful tips to get it just right:
Tips for Successful Cookie Texture
- Chill Your Dough: Letting your dough rest for at least 30 minutes in the fridge will help it firm up, ensuring your cookies hold their shape during baking.
- Don’t Overmix: Mix your ingredients until just combined. Overmixing can lead to tough cookies, whereas a gentler approach will keep them soft and chewy.
- Watch Your Oven Temperature: Every oven is different. If you have an oven thermometer, it can help you check that your temperature is on point.
Common Pitfalls to Avoid
- Skipping the Cooling: Allow cookies to cool on the baking sheet for a few minutes before transferring them to a wire rack. This prevents breaking.
- Not Measuring Properly: Accurate measurements are crucial. Use a kitchen scale if possible; it makes a noticeable difference in baking.
- Choosing the Wrong Chocolate: Ensure you go for high-quality chocolate for melting the tops of your witch hat Halloween cookies. It elevates the overall flavor and presentation.
These small adjustments can lead to a delightful batch of cookies that are sure to impress at any Halloween gathering! If you’re interested in holiday ingredients, consider checking out this source for more tips. Happy baking!
Serving suggestions for Witch Hat Halloween Cookies
Perfect pairings for your Halloween treats
When it comes to serving your witch hat Halloween cookies, consider pairing them with festive beverages to elevate the Halloween spirit. Think about serving them alongside hot apple cider or pumpkin spice lattes. The warm, spiced flavors balance perfectly with the sweet chocolatey cookies.
Additionally, mini marshmallow ghost snacks and crunchy caramel popcorn add fun textures and tastes that complement the cookies beautifully. For a more unique pairing, you might even try cold brew coffee—the rich, smooth flavor pairs well with the sweetness of your cookies.
Presentation ideas for Halloween parties
Make your witch hat Halloween cookies the star of your table by presenting them creatively. Arrange them on a black or orange platter, and consider using decorative cobwebs for an added spooky touch.
For an extra dash of fun, you can place a small cauldron filled with gummy worms or candy eyeballs next to the cookies. This interactive element invites your guests to indulge their sweet tooth even more. By making your presentation engaging and fun, you’ll create a memorable experience for your guests at this Halloween season!
Tips for Making Perfect Witch Hat Halloween Cookies
Baking times and temperature insights
When it comes to crafting witch hat Halloween cookies, the right temperature is key. Preheat your oven to 350°F (175°C)—this ensures even baking. Keep an eye on the cookies during the last few minutes; they should be golden around the edges but soft in the center. Generally, bake for 8–10 minutes, but every oven can be a bit quirky, so a few moments longer or shorter can make a big difference. Make sure to rotate the baking sheets halfway through to achieve that even, witchy perfection.
Storage recommendations for freshness
To keep your witch hat Halloween cookies fresh and delicious, store them in an airtight container at room temperature. They’ll stay good for about a week, which gives you plenty of time to enjoy them or share with friends. If you want to keep them longer, consider freezing them. Just place the cookies in a single layer on a baking sheet to freeze before transferring them to a freezer-safe bag. This way, you can summon those delightful flavors any time you desire! For more tips on cookie storage, check resources from culinary experts like The Kitchn.
Baking can be such fun, especially with festive treats. So gather your ingredients, unleash your creativity, and enjoy making these whimsical cookies!
Time Details for Witch Hat Halloween Cookies
Preparation Time
Making your witch hat Halloween cookies doesn’t take too long! Set aside about 20 minutes for preparation. This includes gathering your ingredients, mixing your dough, and shaping those adorable hats.
Baking Time
Once your cookies are ready to go, they’ll just need a quick 10-12 minutes in the oven. Keep an eye on them to ensure they don’t overbake—golden edges are your guide!
Total Time
In total, you’re looking at approximately 30-35 minutes from start to finish. Perfect for a fun festive gathering or an impromptu Halloween party. For more cookie inspiration, check out Taste of Home’s cookie ideas for a broader selection!
Just think, in less than an hour, you can have these delightful witch hat cookies ready for your Halloween festivities. They’re sure to impress your guests and add a sprinkle of magic to your gatherings!
Nutritional information for Witch Hat Halloween Cookies
When it comes to indulging in festive treats, it’s vital to know what you’re consuming. Let’s dive into the nutritional information of these delightful Witch Hat Halloween Cookies!
Calories per cookie
Each cookie has approximately 120 calories. While it’s a treat, you can enjoy it guilt-free when shared among friends during a spooky gathering!
Breakdown of key nutrients
These cookies not only satisfy your sweet tooth but offer beneficial nutrients as well. Here’s a quick look at what you get in a typical cookie:
- Fat: 6g (mainly from butter)
- Carbohydrates: 17g (sourced from flour and sugar)
- Protein: 1g (thanks to the eggs used)
- Fiber: 0.5g (from the flour)
Chocolate tips add an extra dose of antioxidants! If you’re interested in understanding more about how cookies fit into a balanced diet, check out resources from the Academy of Nutrition and Dietetics.
In moderation, these Witch Hat Halloween Cookies can be a delightful addition to your October festivities, enhancing not just your celebrations but also your dietary variety! Why not whip up a batch to see for yourself?
FAQs about Witch Hat Halloween Cookies
Can I use alternative nut butters?
Absolutely! If you’re looking for options, feel free to swap out the nut butter for alternatives like sunflower seed butter or soy nut butter. These substitutes can help accommodate nut allergies or cater to different taste preferences. Just remember that the texture might change slightly, impacting the final cookie’s firmness or taste, but they’ll still be delicious!
How can I store leftover cookies?
Storing your Witch Hat Halloween Cookies is simple! Place the cookies in an airtight container at room temperature, and they’ll stay fresh for up to a week. If you’re looking to preserve them even longer, consider freezing them. Just make sure they’re fully cooled, then layer them between parchment paper in a freezer-safe container. To enjoy later, let them thaw at room temperature or pop them in the microwave for a few seconds!
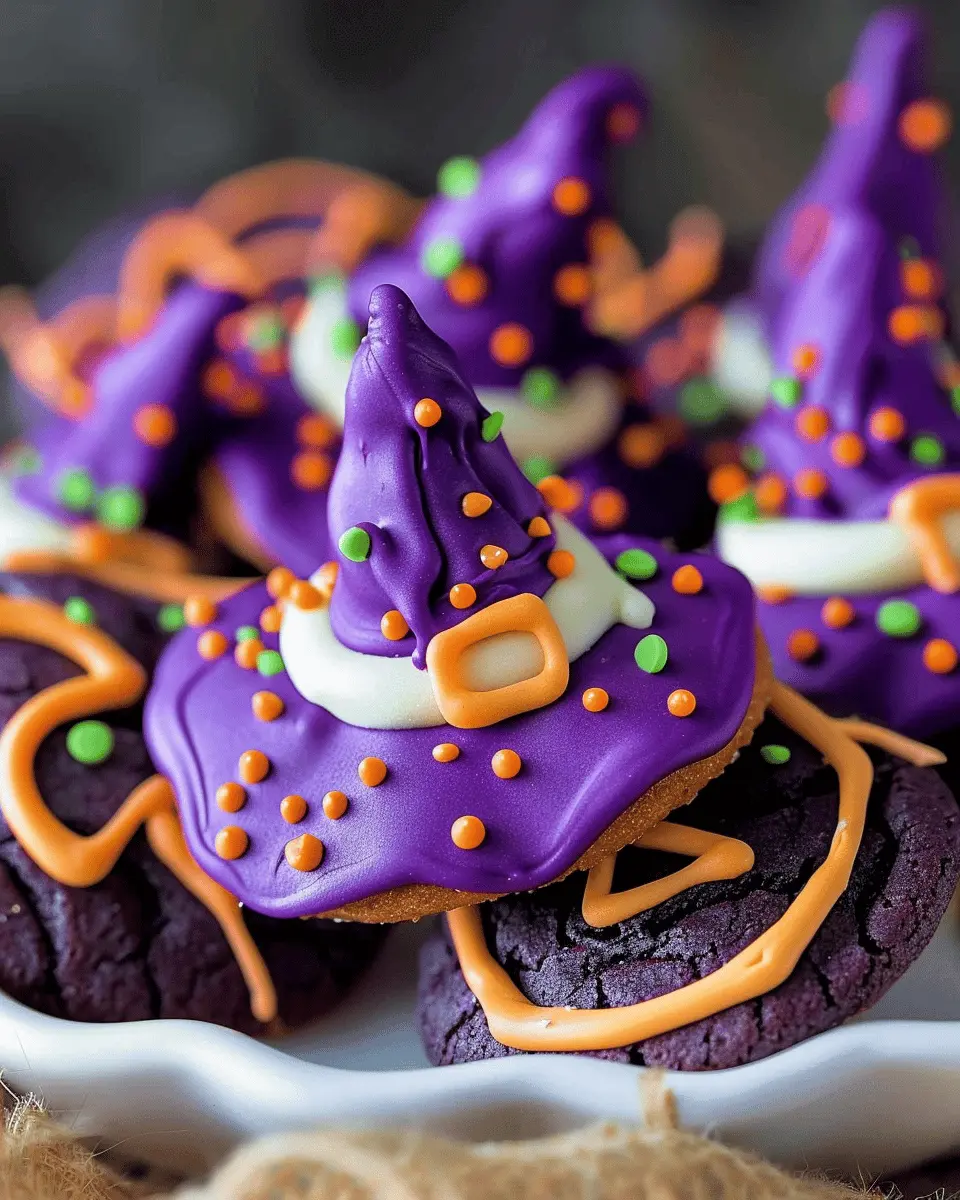
What are creative ways to decorate these cookies?
Decorating Witch Hat Halloween Cookies opens up a world of fun possibilities! You might start with classic black and orange icing, but don’t stop there. Why not experiment with edible glitter or candy eyes for added spookiness? You could even use small pieces of candy corn for the hat’s tip or add edible spider rings for a creepy twist. If you’re feeling adventurous, check out resources like Bakerella for more inspiration on Halloween-themed treats.
By personalizing your cookies, you can make each one uniquely yours, perfect for sharing at parties or enjoying with family. Happy decorating!
Conclusion on Witch Hat Halloween Cookies
The joy of homemade treats for Halloween
As the leaves turn and Halloween approaches, there’s something truly special about crafting your own Witch Hat Halloween Cookies. Baking together can create lasting memories, whether with friends or family. You might find that the laughter and creativity in the kitchen make your celebrations even sweeter. Did you know that according to a survey by the American Baking Association, 78% of people believe baking together strengthens relationships?
These whimsical cookies are not only tasty but also a fun way to get into the spooky spirit. So grab your ingredients, and let’s conjure up some magic this Halloween season! For more festive ideas, check out resources like the Halloween Baking Association for inspiration.
PrintWitch Hat Halloween Cookies: Easy and Fun Treats for Spooky Times

These Witch Hat Halloween Cookies are a delightful treat for any spooky celebration, combining fun and creativity in the kitchen.
- Prep Time: 15 minutes
- Cook Time: 10 minutes
- Total Time: 25 minutes
- Yield: 24 cookies
- Category: Desserts
- Method: Baking
- Cuisine: American
- Diet: Vegetarian
Ingredients
- 1 cup peanut butter
- 1 cup sugar
- 1 egg
- 24 chocolate kisses
- 1/2 cup orange frosting
- 1/2 cup Halloween sprinkles
Instructions
- Preheat your oven to 350°F (175°C).
- In a bowl, mix peanut butter, sugar, and egg until well combined.
- Shape the dough into small balls and place them on a baking sheet.
- Bake for 10 minutes, then remove from the oven.
- While warm, gently press a chocolate kiss into the center of each cookie.
- Allow to cool completely before adding frosting.
- Pipe orange frosting around the base of the chocolate kiss and sprinkle with Halloween sprinkles.
Notes
- For a fun twist, use different colors of frosting for the hats.
Nutrition
- Serving Size: 1 cookie
- Calories: 120
- Sugar: 10g
- Sodium: 50mg
- Fat: 6g
- Saturated Fat: 2g
- Unsaturated Fat: 4g
- Trans Fat: 0g
- Carbohydrates: 15g
- Fiber: 1g
- Protein: 3g
- Cholesterol: 10mg